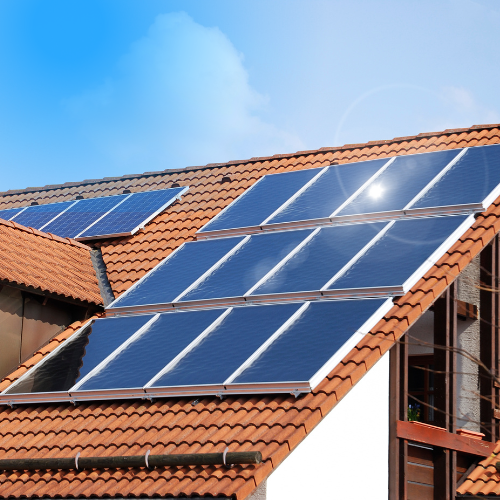
Installing a solar panel at home is an increasingly popular solution for reducing electricity bills while generating clean, renewable solar energy. In addition to being a practical way to meet a household’s daily energy needs, this type of system is also ideal for cottages, secondary residences, or remote locations off the power grid, where energy independence becomes essential. In this article, we present the key steps to follow before installing your solar panel, to help you maximize your investment and ensure optimal performance.
1. Assess Your Energy Needs
Before installing a solar panel, it’s essential to understand your average electricity consumption. This information can be found on your electricity bills and is usually expressed in kilowatt-hours (kWh). It will help you determine the required capacity of the solar system to meet your needs. For example, if you consume 500 kWh per month, a 4 to 5 kW system is generally sufficient, depending on the amount of sunlight in your region. The more accurate your assessment, the better your system will match your actual consumption.
2. Analyze Your Roof
Not all roofs are suitable for solar panel installation. Several factors need to be checked beforehand: the ideal orientation is south-facing (in the Northern Hemisphere), with a tilt between 30° and 35° for optimal efficiency. It’s also important to make sure the roof is free of shading from trees, chimneys, or nearby buildings, as any shade can significantly reduce solar energy production.
It’s also crucial to assess the structural integrity of the roof, as it must be able to support the weight of the panels and mounting system. Lastly, selecting a location with maximum sun exposure throughout the day is a key factor in ensuring the profitability of your installation.
3. Choose the Necessary Equipment
A complete residential solar system requires several components. The solar panels themselves can be either monocrystalline or polycrystalline. Monocrystalline panels are more efficient and compact, making them ideal for smaller roofs or areas with limited sunlight, but they are also more expensive. In contrast, polycrystalline panels are more affordable but slightly less efficient, making them better suited for large, well-exposed surfaces.
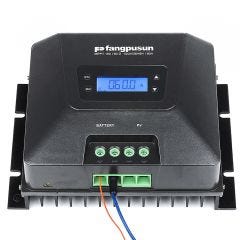
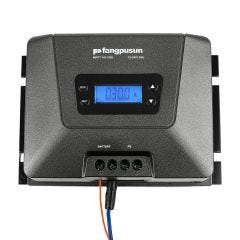
Next, the inverter is essential—it converts the direct current (DC) generated by the panels into alternating current (AC) that your household appliances can use. Adding batteries is optional, but they allow you to store solar energy for nighttime use or during power outages. If you choose to include batteries, a charge controller is necessary to safely manage the charging and discharging process. Other essential components include the mounting structure, weather-resistant wiring, connectors, protective enclosures, circuit breakers, and optionally, a monitoring system to track real-time energy production.
4. Install the System
Installation involves several technical steps. The first is mounting the metal supports on your roof, following the previously determined orientation and tilt, while ensuring waterproofing. Once the supports are secured, the solar panels can be installed and connected—either in series or in parallel, depending on the desired configuration.
The inverter should be installed in a dry, well-ventilated area protected from direct sunlight, ideally close to the main electrical panel. If batteries are included, they must be properly ventilated and connected through a charge controller to prevent electrical risks. Electrical wiring is a crucial step: the inverter is connected to the main electrical panel via a protective circuit breaker. If your system is grid-connected, a bidirectional meter is required to measure both the energy consumed and the energy fed back into the grid. Once the installation is complete, commissioning ensures that all components are functioning properly: actual electricity production, data display on the inverter, secure connections, and monitoring system performance, if one is installed.
Installing a solar panel at home is an excellent way to save energy while contributing to the ecological transition. With careful planning and quality equipment, it's possible to generate your own solar energy—whether for a city home, a countryside cottage, or an off-grid location. This choice is a long-term investment that enhances your energy independence and increases your property’s value, all while reducing your carbon footprint.
Browse our full range of solar installation products [here]. For more information about installing your solar panel, visit an Addison Électronique store. Our advisors will be happy to assist you and help make your project a success.